nnUNet
配置环境
在AutoDL云服务器里租用一个4090显卡,无卡模式下开机。
打开终端,然后创建一个虚拟环境
1
| conda create -n nnunetv2 python=3.10
|
进入虚拟环境
1
| conda activate nnunetv2
|
确认一下服务器的cuda版本(可选,低版本一般不用),如果要确认,需要在有卡模式开机。
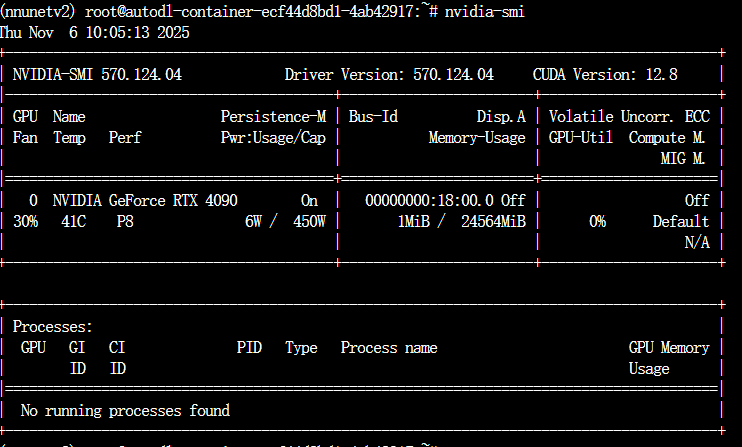
可见CUDA Version:12.8,我们进入pytorch官网,选个低一点的
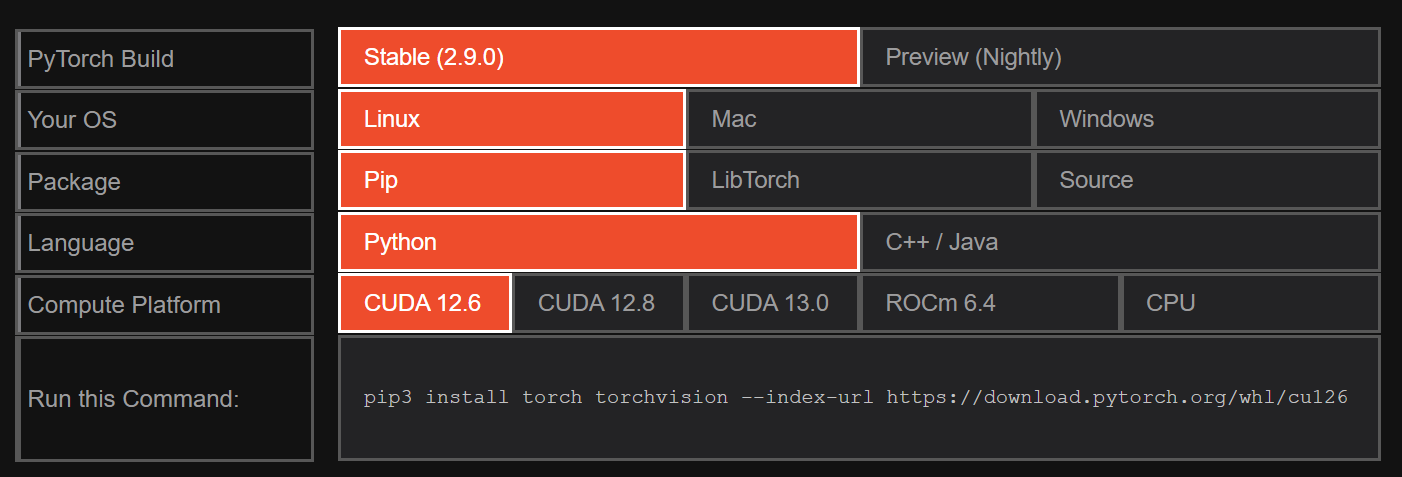
1
| pip3 install torch torchvision --index-url https://download.pytorch.org/whl/cu126
|
在终端里输入上述命令。然后下载nnunet-v2代码
1
2
3
4
| git clone https://github.com/MIC-DKFZ/nnUNet.git
cd nnUNet
pip install -e .
pip install --upgrade git+https://github.com/FabianIsensee/hiddenlayer.git
|
预处理和训练
创建三个文件夹,预处理,数据集,运行结果文件夹,并给赋予变量地址。然后把自己的数据集放置到nnUNet_raw 文件夹下。这里我用的数据集来自于
Task04_Hippocampus_数据集-飞桨AI Studio星河社区,数据集很小,适合入门训练。
运行预处理命令
1
| nnUNetv2_plan_and_preprocess -d 4 --verify_dataset_integrity
|
配置环境变量
1
2
3
| export nnUNet_raw=/root/nnUNet/nnUNet_raw
export nnUNet_preprocessed=/root/nnUNet/nnUNet_preprocessed
export nnUNet_results=/root/nnUNet/nnUNet_results
|
至此可以开始训练了,但是原始的epoch非常大,我们的数据集很小,没必要1000个epoch。事实上我运行了1折1000个epoch后发现它在100个epoch就接近稳定了,因此美观和稳妥起见,我这里修改为300个epoch。并采用5个fold训练。
1
2
3
4
5
| nnUNetv2_train 4 2d 0
nnUNetv2_train 4 2d 1
nnUNetv2_train 4 2d 2
nnUNetv2_train 4 2d 3
nnUNetv2_train 4 2d 4
|